Installation Guide
This page will guide you through the installation process. You may choose to manually build the website or download a pre-built version.
Table of contents
Building requirements
- Node.js
- Git
- Basic CLI knowledge
Ensure you have at least Node.js installed on your system. Regardless of whether you choose to clone the repository or download a pre-built release, Node.js’s http-server or any dedicated HTTP server is required to serve the website locally.
Downloading the website
Cloning the repository (Method 1)
To start off, you’ll first need to download (or “clone”) Online Web Clock’s source code.
- Ensure you have Git installed on your PC
- If you’re on Ubuntu or a Debian-based distro, you can install Git with the following command:
sudo apt install git -y - If you’re on Windows, you can download Git from the official website
- If you’re on Ubuntu or a Debian-based distro, you can install Git with the following command:
- Open the Terminal (or Command Prompt) and clone the repository and
cdinto it with this command:
git clone https://github.com/iKarTehFox/web-clock.git && cd web-clock- If you are using an IDE like VS Code, you can clone the repository using this URL:
https://github.com/iKarTehFox/web-clock.git
- If you are using an IDE like VS Code, you can clone the repository using this URL:
- Skip to Building the website
Downloading a release (Method 2)
If you would rather download a pre-built version of the website, you can download the latest release from the releases page
- In the releases page, find the latest release and decide whether you want to download the
.zipor.7zfile.- If you have 7-zip on your system, use the
.7zfile, else just download the.zipfile.
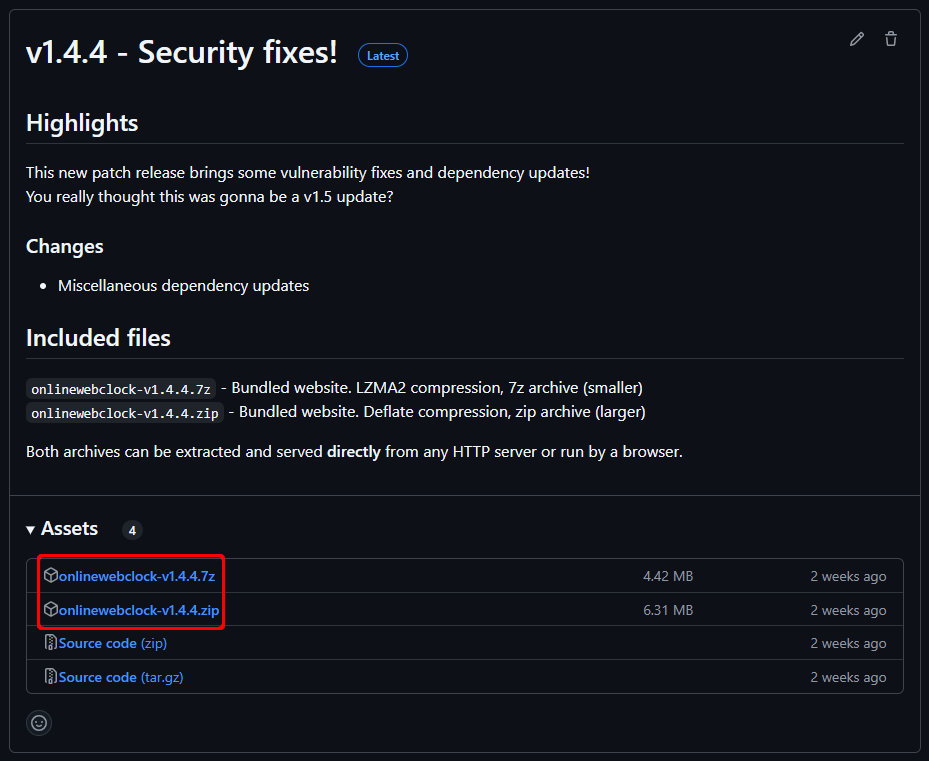
- If you have 7-zip on your system, use the
-
Extract the archive and open the new folder.
- Skip to Serving the website
Building the website (if cloned)
If you cloned the repository, you’ll need to build the website before you can run it.
To build the website, you’ll first need to install the dependencies.
- Run
npm installto install the dependencies. - Run
npm run build:prodto build the website for production.- If you want to build the website for development, run
npm run build:devinstead.
- If you want to build the website for development, run
Serving the website
After you have downloaded or built the website, you can now serve it locally.
Ensure you have a tool to serve the website (e.g. Node.js http-server, Python http.server, etc.). Double-clicking the index.html file will NOT work!
With Node.js, you can use the http-server command to serve the website.
- Install
http-serverglobally by runningnpm install -g http-server(usesudoif necessary).- If you built from source: Run
http-server -p 80 ./distto serve the built website in ./dist on port 80. - If you downloaded a release: Run
http-server -p 80 ./to serve the website in the current directory on port 80.
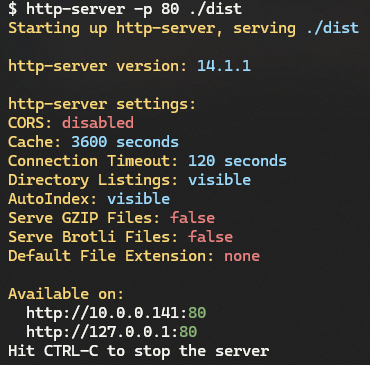
- If you built from source: Run
- Open your browser and go to
http://127.0.0.1to view the website.- Don’t forget to include the port number
http://IP:PORTif you’re using a port other than 80.
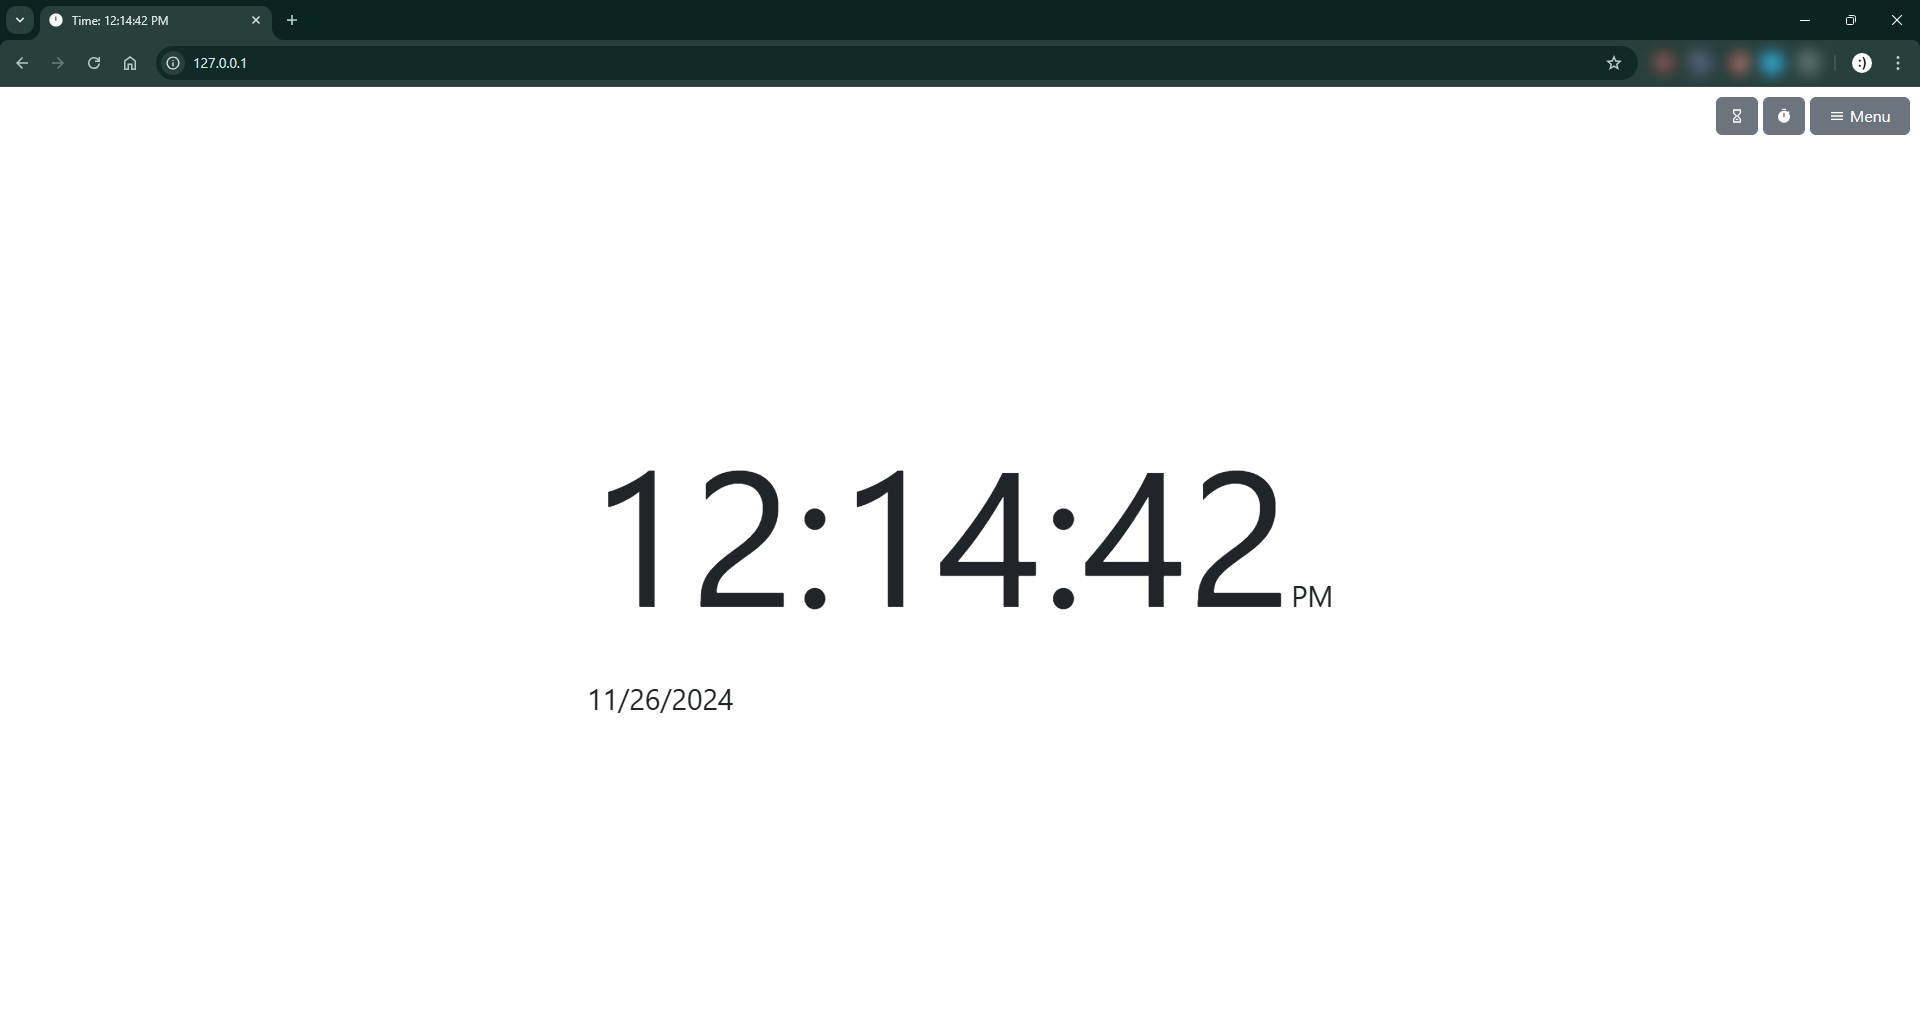
- Don’t forget to include the port number